


Understanding Heat Sinks: Essential Cooling Solutions

Understanding Heat Sinks: Essential Cooling Solutions
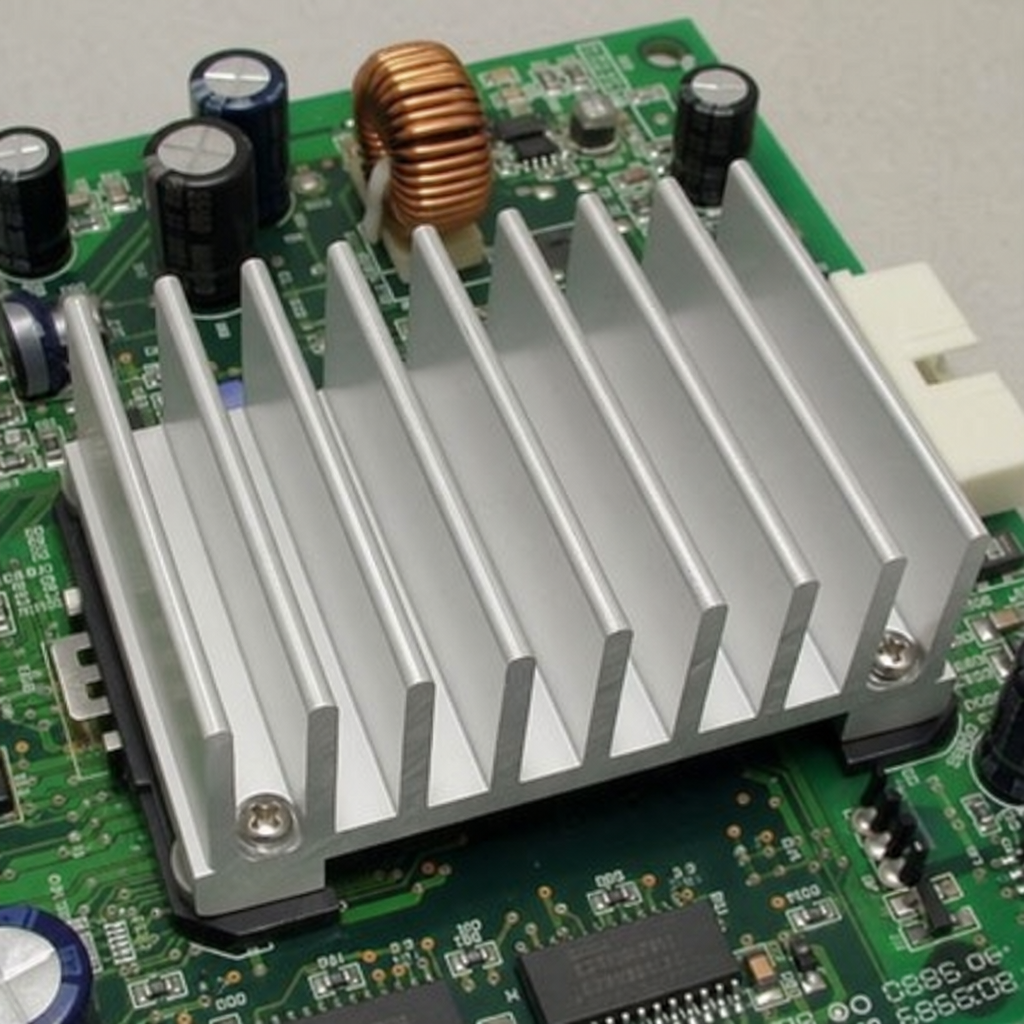
Heat sinks are essential cooling solutions that help electronic components stay within safe operating temperatures. By moving heat away from chips, LEDs, power devices, and processors, they support reliability, performance, and longer equipment life. This guide explains how heat sinks work, what materials and heat sink types are commonly used, and how to choose the right option for practical thermal management.
What do heat sinks actually do?
Heat sinks absorb heat from a warmer component and spread it across a larger surface area so that heat can leave more efficiently. In simple terms, they give excess heat somewhere useful to go. That process supports heat dissipation through conduction, convection, and sometimes radiation, depending on the design and environment.
Most electronic components generate heat as they operate. A processor, power transistor, LED module, voltage regulator, or single-board computer can all become too hot if that heat remains trapped at the source. Heat sinks reduce this risk by creating a thermal path away from the component and into the surrounding air, enclosure, liquid loop, or other cooling medium.
A basic heat sink may look like a block of metal with fins, but its performance depends on more than size. Material choice, surface area, airflow, contact pressure, mounting method, fin spacing, and thermal interface quality all influence how well it works. A well-matched heat sink does not just look robust; it fits the thermal load, space constraints, and operating conditions of the device.

The role of thermal management in reliable electronics
Thermal management is the practice of controlling temperature so electronics can operate safely and consistently. It matters because heat affects electrical performance, mechanical stability, and long-term reliability. Even when a device does not fail immediately, repeated overheating can accelerate wear, loosen connections, dry out materials, and reduce operating life.
In many applications, electronic cooling is not an optional design detail. It is part of the product’s ability to function as intended. A compact enclosure, bright LED array, high-speed processor, or power-dense control module can all create localized hot spots. Without an effective cooling path, those hot spots may trigger throttling, color shift, shutdowns, reduced efficiency, or premature component failure.
Heat sinks are popular because they can be simple, dependable, and scalable. Some support passive cooling with no moving parts. Others work with fans, ducts, or liquid systems for higher heat loads. The right approach depends on how much heat must be removed, how much space is available, what the ambient temperature will be, and how quiet or maintenance-free the system needs to be.
Useful thermal management starts early. If cooling is considered only after a device overheats, the available fixes may be limited. When heat sink design is part of the original layout, engineers and builders can position components intelligently, create better airflow paths, choose suitable materials, and avoid unnecessary thermal bottlenecks.
Common heat sink types and where they fit
Different heat sink types exist because not every application has the same thermal, mechanical, or budget requirements. A small control board may only need a compact stick-on heat sink, while a high-power processor may need a finned assembly with a fan or liquid loop. Understanding the major categories helps narrow the options quickly.
Aluminum heat sinks for versatile cooling
Aluminum heat sinks are among the most common choices because they offer a practical balance of weight, cost, machinability, and thermal performance. Aluminum is easy to extrude, cut, drill, anodize, and customize, making it suitable for many electronics, lighting, power, and enclosure applications.
They are often used when moderate to strong cooling is needed without adding excessive weight. Finned aluminum profiles can provide generous surface area, and the material responds well to forced airflow. For many everyday cooling solutions, aluminum is the default starting point because it is adaptable and widely available.
Copper heat sinks for higher conductivity needs
Copper heat sinks are valued for excellent thermal conductivity. They can move heat away from a hot component very effectively, which is useful when heat must be spread quickly from a small, intense source. Copper is often considered for compact high-performance assemblies, base plates, or hybrid designs where heat spreading is critical.
The tradeoff is that copper is heavier and typically more expensive than aluminum. It may also be less convenient for some manufacturing methods or weight-sensitive products. In many designs, copper is used selectively, such as a copper base paired with aluminum fins, to combine strong heat spreading with manageable weight and cost.
Skived heat sinks for dense fin structures
Skived heat sinks are made by cutting thin fins from a single block of material, often copper or aluminum. Because the fins and base are formed from one piece, there is no separate fin-to-base joint creating additional thermal resistance. This can be helpful in applications that need closely spaced fins and efficient heat transfer from the base into the fin field.
Skiving can create very thin, high-density fins that increase surface area in a compact footprint. These designs can be useful for high-performance electronics, telecom equipment, power modules, and other applications where space is tight but heat dissipation requirements are demanding. As with any dense fin design, airflow conditions matter; fins that are too tight for the available airflow may not perform as expected.
CPU heat sinks for processors and computing devices
CPU heat sinks are designed to remove heat from processors, which can generate significant thermal loads in a small contact area. Many CPU coolers combine a heat spreader base, fins, heat pipes, and one or more fans. The goal is to move heat away from the processor quickly enough to prevent throttling or shutdown.
For desktops, workstations, embedded computers, and servers, the best CPU cooling option depends on processor power, case airflow, noise goals, and available mounting space. Contact quality is especially important. A cooler with impressive fins can underperform if it is installed with poor mounting pressure or uneven thermal paste.
LED heat sinks for lighting stability
LED heat sinks support brightness, color consistency, and service life in lighting systems. High-power LEDs convert a portion of electrical energy into heat, and that heat must move away from the LED junction. If it does not, the lighting system may lose output, shift in color, or age faster than expected.
LED heat sinks often prioritize broad contact surfaces, lightweight profiles, and natural convection. In architectural, industrial, automotive, and grow-light applications, the heat sink may also be part of the fixture’s visible design. This makes thermal performance and appearance important at the same time.
Raspberry Pi 4 heat sinks for compact board cooling
Raspberry Pi 4 heat sinks are small cooling accessories used to help manage heat on the board’s main processor and related components. They are often paired with compact cases, small fans, or ventilated enclosures. For hobby projects, prototypes, media setups, and embedded applications, these heat sinks can help reduce temperature buildup in cramped spaces.
The key is matching the cooling method to the workload and enclosure. A small passive heat sink may be enough for light use in open air, while heavier processing inside a closed case may benefit from fan-assisted airflow. Installation should be clean and secure so the thermal pad or adhesive makes full contact with the chip surface.
Water cooled heat sinks for high heat loads
Water cooled heat sinks, often called liquid cold plates or liquid-cooled heat sinks, move heat into a circulating fluid instead of relying only on air. They are used when heat loads are too high, space is too constrained, or air cooling cannot meet the design goal. The fluid carries heat away to a radiator, chiller, or other heat exchanger.
These systems can be very effective, but they add complexity. Pumps, fittings, seals, coolant compatibility, maintenance, and leak protection all become part of the design. Water cooled heat sinks make sense when the performance requirement justifies the added system considerations.
How does heat sink design affect performance?
Heat sink design affects performance by controlling how easily heat moves from the component into the heat sink and from the heat sink into the surrounding environment. A design with good thermal conductivity but poor airflow may still struggle. Likewise, a large heat sink with a weak contact interface may not receive heat efficiently enough to cool the component.
Several design details deserve attention:
- Base thickness: A thicker base can spread heat across more fins, but too much thickness can add weight and material without proportional benefit.
- Fin height and spacing: Taller fins add area, while spacing must suit the airflow. Natural convection usually needs more open spacing than forced-air cooling.
- Surface area: More exposed area generally improves heat dissipation, but only if air or liquid can actually reach those surfaces.
- Mounting pressure: Stable contact helps reduce thermal resistance between the component and heat sink.
- Thermal interface material: Pads, paste, phase-change materials, or adhesives fill microscopic gaps that would otherwise trap insulating air.
- Orientation: Passive cooling depends on warm air rising, so fin direction and product orientation can significantly influence results.
- Environmental conditions: Ambient temperature, dust, vibration, altitude, and enclosure design all affect cooling performance.
Good design is rarely about maximizing one variable. The best heat sink is the one that works as part of the complete system. That means considering the heat source, interface, mechanical mounting, airflow path, service environment, and manufacturing requirements together. Newest in the store


Passive cooling and active cooling both have a place
Passive cooling uses natural convection and radiation, with no fan or pump. It is quiet, simple, and low maintenance, which makes it attractive for sealed devices, remote installations, consumer electronics, lighting fixtures, and equipment where reliability is more important than aggressive cooling. Passive heat sinks are often larger because they depend on natural air movement rather than forced flow.
Active cooling adds a fan, blower, pump, or other moving mechanism. This can remove more heat from a smaller footprint, but it also introduces noise, power consumption, and potential maintenance. Fans can fail, filters can clog, and pumps add system complexity.
A practical selection process starts with the heat load and the environment. If a device produces modest heat and has enough exposed surface area, passive cooling may be the cleanest solution. If the product is compact, sealed near other warm components, or exposed to high ambient temperatures, active cooling or hybrid cooling may be necessary.
Material choice starts with thermal conductivity
Thermal conductivity describes how well a material conducts heat. In heat sinks, higher conductivity helps move heat from the hot contact point through the base and into the fins or cooling surface. This is why copper and aluminum are so common: both conduct heat far better than many structural materials.
However, thermal conductivity is only one part of the decision. A material that conducts heat well may be too heavy, costly, difficult to manufacture, or unsuitable for the operating environment. Aluminum is lightweight and adaptable. Copper conducts heat very well but adds weight and cost. Surface finishes, corrosion resistance, electrical isolation, and assembly requirements may also influence the final choice.
For many products, the best result comes from balancing performance and practicality. A power module might use a copper insert where heat is concentrated and an aluminum fin field where weight and area matter. A lighting fixture might use aluminum because it offers enough cooling while supporting a clean visual profile. A compact computing device may use a small adhesive aluminum sink, a copper shim, or a fan-assisted case depending on the workload.
Signs a heat sink may be damaged or underperforming
Damaged heat sinks can quietly undermine cooling performance. Because heat sinks are often simple metal parts, it is easy to assume they either work or they do not. In reality, dents, clogged fins, warped bases, loose mounts, dried thermal compound, corrosion, or broken fan attachments can reduce performance enough to cause intermittent issues.
Watch for these warning signs:
- Device temperatures are higher than usual under the same workload.
- Fans run louder or more often because the system is compensating for poor heat transfer.
- The heat sink feels loose, uneven, or poorly seated.
- Fins are bent, crushed, dusty, or blocked by cables.
- Thermal pads are torn, shifted, hardened, or contaminated.
- Thermal paste is dry, uneven, excessive, or missing.
- The device throttles, shuts down, flickers, dims, or behaves unpredictably.
- Corrosion or discoloration appears around the heat sink, fasteners, or mounting area.
Not every damaged heat sink needs immediate replacement, but every cooling issue deserves inspection. Sometimes the fix is as simple as cleaning dust from fins and restoring airflow. Other times, the heat sink should be replaced because the base is no longer flat, mounting hardware is compromised, or the thermal interface cannot be restored reliably.

Choosing the right cooling solution for your application
Selecting heat sinks becomes easier when you start with the application instead of the catalog. The same heat sink that works well on an open bench may fail inside a sealed enclosure. A beautifully machined copper part may be unnecessary if a standard aluminum extrusion meets the thermal need. The goal is not to buy the biggest heat sink; it is to choose the most appropriate cooling path.
Use this checklist before selecting or specifying a heat sink:
- Define the heat source. Identify which component creates heat, how much heat it produces, and whether that heat is steady or intermittent.
- Know the temperature limit. Determine the maximum safe component, board, case, or junction temperature.
- Check the available space. Measure height, footprint, nearby components, airflow clearance, and mounting access.
- Understand the environment. Consider ambient temperature, dust, moisture, vibration, enclosure material, and product orientation.
- Decide on passive or active cooling. Choose passive cooling when simplicity and silence are priorities, and active cooling when heat density is higher.
- Select a suitable material. Compare aluminum heat sinks, copper heat sinks, or hybrid approaches based on performance, weight, and manufacturing needs.
- Plan the interface. Choose thermal pads, paste, adhesives, clips, screws, or springs that maintain consistent contact.
- Allow airflow to do its job. Keep fins clear, avoid trapping hot air, and place vents or fans where they support the natural heat path.
- Prototype and test. Real-world conditions often reveal issues that calculations miss, especially inside compact enclosures.
- Review maintenance needs. If dust, fans, or coolant are involved, build in access for inspection and service.
This process works for many applications, from led heat sinks and cpu heat sinks to industrial power electronics and compact development boards. It also helps prevent overdesign. A lightweight standard part may be enough, while a custom solution may be justified when geometry, appearance, airflow, or performance requirements are more demanding.
When custom heat sinks make sense
Custom heat sinks are useful when standard parts cannot meet the mechanical, thermal, or design requirements of the application. A product may need a specific footprint, unusual fin direction, integrated mounting features, special surface finish, electrical isolation, or compatibility with a unique enclosure. In those cases, custom design can turn the heat sink into a more integrated part of the product rather than an add-on.
Customization can also improve assembly. A heat sink with the right holes, clips, bosses, cutouts, or interface surfaces may reduce installation time and improve consistency. For products built in volume, this can matter as much as raw thermal performance. A cooling component that is easy to install correctly is less likely to create field problems.
Custom does not always mean complex. It might be a modified extrusion, a machined base plate, a skived fin array, a bonded fin assembly, or a liquid cold plate. The best path depends on the thermal load, production quantity, cost target, and physical constraints. Early collaboration between mechanical, electrical, and thermal stakeholders usually leads to a cleaner result.
Practical installation tips for better heat dissipation
Even a well-designed heat sink can underperform if it is installed poorly. Heat must cross the interface between the component and heat sink before it can spread into the fins. Small gaps, uneven pressure, contamination, or misalignment create thermal resistance that limits heat dissipation.
Follow these practical tips during installation:
- Clean contact surfaces before assembly so dust, oil, or old compound does not interfere with heat transfer.
- Use the right amount of thermal paste; too little leaves gaps, while too much can create mess and uneven contact.
- Do not reuse damaged thermal pads unless the manufacturer clearly allows it.
- Tighten screws or clips evenly to avoid tilting the heat sink.
- Confirm that adhesive heat sinks are positioned correctly before applying pressure.
- Keep fins clear of wires, labels, foam, or enclosure walls that block airflow.
- Avoid touching prepared thermal surfaces with bare fingers.
- Recheck cooling performance after the device is fully enclosed, not only on an open workbench.
For small boards such as Raspberry Pi projects, installation is usually straightforward, but alignment still matters. For larger assemblies, torque control, interface material selection, and mechanical support become more important. Heavy heat sinks may need brackets or backplates so they do not stress the circuit board during shipping, vibration, or long-term use.
Heat sinks are part of a complete cooling system
It is tempting to treat the heat sink as the whole solution, but it is only one part of the thermal path. Heat begins inside the component, moves through packaging and interface material, enters the heat sink, spreads through the base and fins, then leaves through air or liquid. A weakness anywhere along that path can limit the whole system.
This is why good cooling solutions often combine several design choices. A device may use a copper heat spreader, aluminum fins, a carefully placed vent, a quiet fan, and firmware that manages peak loads. An LED fixture may use the housing itself as part of the heat sink. A power electronics assembly may bolt devices to a shared plate that connects to a larger chassis or cold plate.
Thinking in systems also helps with troubleshooting. If temperatures are high, the heat sink may not be the only issue. Airflow could be restricted, the enclosure could be trapping heat, the thermal pad could be too thick, or nearby components could be warming the local environment. Looking at the full heat path leads to better decisions than simply replacing one part with a larger one.

A clear takeaway for better electronic cooling
Heat sinks protect electronics by giving heat a controlled path away from sensitive components. The right choice depends on the heat source, temperature limits, available space, material needs, airflow, and installation quality. Aluminum heat sinks, copper heat sinks, skived heat sinks, led heat sinks, cpu heat sinks, water cooled heat sinks, and custom heat sinks all serve different roles within broader electronic cooling strategies.
For most projects, the smartest approach is practical and systematic: understand the heat load, choose a suitable heat sink type, design for real airflow, install the interface correctly, and test under actual operating conditions. When those pieces work together, heat sinks become more than metal fins. They become essential thermal management tools that help devices perform reliably, quietly, and consistently.