


Arduino Kit Guide for Beginners

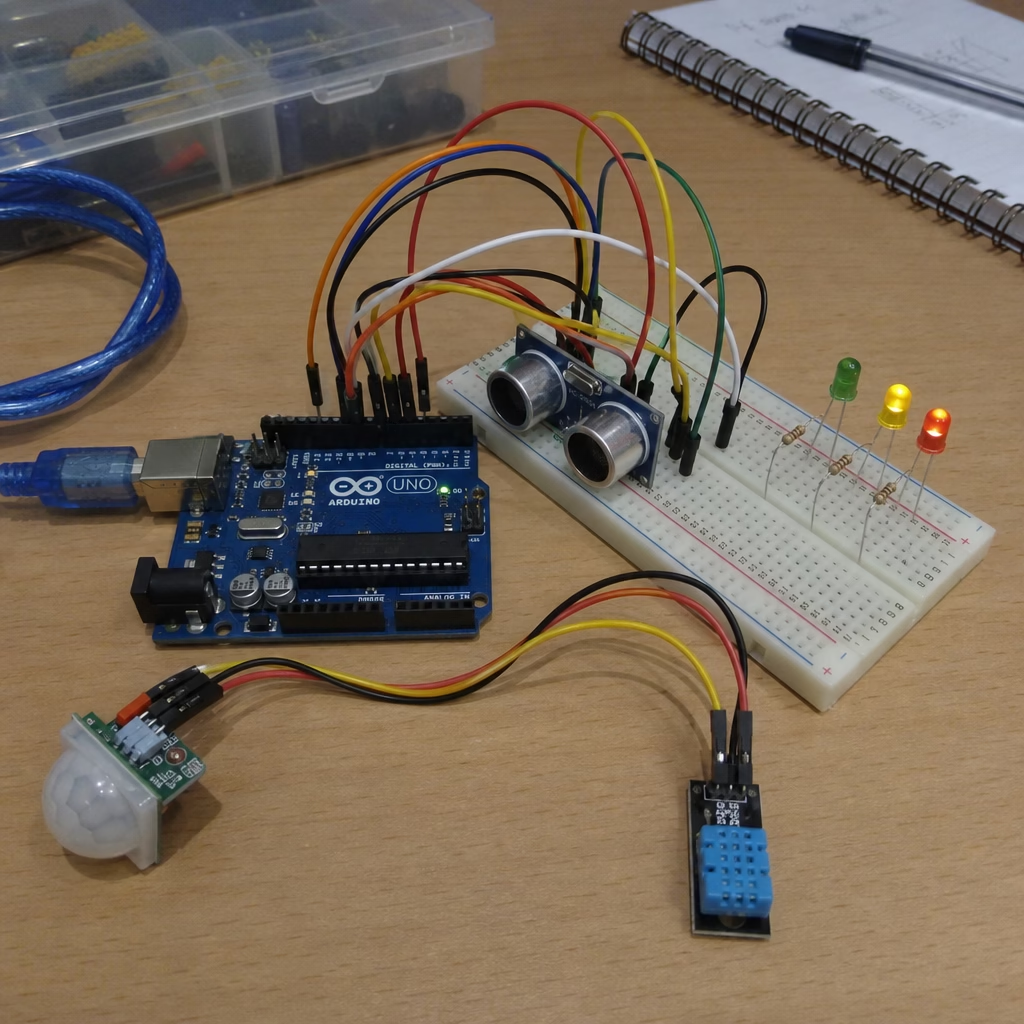
Arduino Kit Guide for Beginners
An Arduino kit is a hands-on way to learn electronics, coding, sensors, automation, and simple robotics. You do not just read about circuits. You wire real parts, upload small code, and see LEDs blink, motors move, and sensors react. This guide shows what is in a typical arduino starter kit, how to choose one, and how to build skill fast.
What should you expect from an Arduino kit?
A good arduino kit should include a board, basic parts, jumper wires, a breadboard, and clear lessons. The best kits are learning systems. They show how inputs, outputs, circuits, and code work together.
Most beginners start with an arduino beginner kit or arduino tutorial kit because these usually balance price, variety, and guided lessons. You can learn to control LEDs, read sensor data, show text, and run small motors before you move on. If robotics is your goal, an arduino robot kit or arduino robotics kit may fit better. These kits often include a chassis, wheels, motors, and motor drivers.

The basic parts inside a starter kit
Before you build anything, spend time learning the parts in your arduino electronics kit. Knowing what each piece does makes tutorials easier and helps you fix problems faster. Even if two kits look different, many share the same core items.
A typical arduino components kit may include:
- Arduino-compatible board: The brain of the project. It runs your code and controls parts.
- USB cable: Used to power the board and upload code from your computer.
- Breadboard: A reusable board for building circuits without soldering.
- Jumper wires: Small wires that connect the board, breadboard, and parts.
- LEDs and resistors: Great for learning outputs, current control, and safety.
- Push buttons and knobs: Useful input devices for controlling behavior.
- Sensors: Depending on the arduino sensors kit, these may read light, heat, sound, distance, motion, or humidity.
- Motors and servos: Used in projects such as doors, wheels, arms, and simple machines.
- Display modules: Some kits include LCD or OLED displays for readings and messages.
- Guide or lessons: Very useful for beginners who want a clear path.
Do not worry if you cannot name every part right away. Lay everything out, compare it with the guide, and label small bags if needed. That simple habit saves time when a lesson asks for a resistor value, sensor module, or cable type.
Choosing the right kit for your goals
The recommended arduino starter kit depends on what you want to learn. A student who wants basic electronics needs a different kit from someone who wants to build a moving robot. The right choice should match your skill level, budget, and project goals.
If you are new, look for the best arduino kit for beginners with clear steps, beginner-friendly examples, and a wide mix of parts. A kit with fewer but better-explained projects is often more useful than a huge box with no guide. If you already know basic wiring, a larger arduino diy kit can give you more room to test ideas.
Consider these common options:
- General starter kit: Best for coding, wiring, LEDs, buttons, sensors, displays, and small motors.
- Sensor-focused kit: Useful if you want to collect data from the real world, such as heat, distance, or light.
- Robotics kit: Ideal for wheels, obstacle avoidance, line following, or remote control.
- Experimenter kit: Made for open-ended learning. Some sellers spell it as arduino expermenter kit, but the usual term is experimenter kit.
- Brand-specific beginner kit: Options such as the dfrobot beginner kit for arduino may appeal to learners who want curated parts and structured lessons.
When you compare kits, do not focus only on the number of pieces. A kit with 250 parts is not always better than one with 80. Clear documentation, durable arduino accessories, and projects that move from easy to hard matter more.
How do you set up your first Arduino project?
To set up your first project, install the Arduino programming software, connect the board to your computer, choose the right board and port, wire a simple circuit, and upload a test sketch. The classic first project is blinking an LED because it proves your board, cable, software, and wiring are working.
Start by downloading the Arduino IDE or using a web-based editor if your board supports it. Plug the board into your computer with the USB cable, then select the board model and port in the software. Open a basic Blink example, upload it, and watch the onboard LED flash.
After that, build the same idea on a breadboard with an external LED and resistor. This helps you see that code and wiring both matter. If the LED does not turn on, check the LED direction, resistor placement, jumper wire connections, and selected port before assuming the board is faulty.
A simple beginner workflow looks like this:
- Read the lesson once before wiring.
- Build the circuit slowly.
- Upload the code without editing first.
- Change one thing at a time.
- Write notes.
This process may feel slow at first, but it builds real troubleshooting skills. Electronics gets easier when you test small parts of a system instead of changing everything at once.

Building confidence with code and circuits
An arduino programming guide often begins with simple commands like setting a pin as an output, turning a pin on or off, reading a button, or printing data to the serial monitor. These basics may look small, but they form the base for almost every project. A robot, alarm, weather station, or smart light is usually a mix of simple inputs, decisions, and outputs.
Focus on a few core ideas:
- Pins: Physical connection points that can send or receive signals.
- Digital signals: Simple on/off states, often used for buttons, LEDs, and relays.
- Analog readings: Changing values, often used for sensors and knobs.
- Variables: Names that store values, such as heat or motor speed.
- Conditions: Code that makes decisions, such as if the distance is low, stop the motor.
- Loops: Repeated instructions that keep your project running.
Once these ideas make sense, you can combine them in creative ways.
A light sensor can turn on an LED when a room gets dark.
A button can change display modes.
An ultrasonic sensor can help a small robot avoid obstacles.
The same building blocks appear again and again.Newest in the store


Practical Arduino project ideas for beginners
The best arduino project ideas are simple enough to finish but flexible enough to change. You want early wins that teach one or two ideas at a time. After each project works, add one small feature.
Try these beginner-friendly ideas:
- Traffic light simulator: Use red, yellow, and green LEDs to practice timing and order.
- Button-controlled LED: Learn how input changes output.
- Temperature display: Combine a sensor with a display module to show live readings.
- Light-sensitive night lamp: Use a light sensor to switch an LED on in darkness.
- Mini alarm system: Pair a motion or distance sensor with a buzzer.
- Servo door opener: Control a small servo motor with a button or sensor.
- Obstacle-avoiding robot: Use an arduino robot kit with motors, wheels, and a distance sensor.
- Line-following robot: A classic project for an arduino robotics kit that teaches sensor feedback and motor control.
For each project, ask what the input is, what the output is, and what decision the code needs to make. That simple pattern turns hard projects into clear steps.
What affects Arduino kit price in Pakistan?
Arduino kit price in Pakistan can vary based on the board type, number of parts, brand, docs quality, included sensors, robotics parts, and whether the kit is original, compatible, imported, or locally bundled. Prices can also shift with supply, shipping, exchange rates, and seller support, so it is better to compare current listings from trusted suppliers than to rely on a fixed guess.
If you are shopping on a budget, decide what you need before you buy. A low-cost arduino beginner kit may be enough for LEDs, buttons, and basic sensors. If you want robotics, expect to need motors, wheels, a chassis, batteries, and motor control modules, which can raise the total cost.
When comparing kits, look beyond the headline price:
- Does the kit include tutorials you can follow?
- Are the parts labeled clearly?
- Is the board compatible with the Arduino IDE?
- Are common arduino accessories included, such as jumper wires and a breadboard?
- Can you find replacement parts easily?
- Does the seller offer basic support or docs?
A slightly more complete kit can be better value than a cheaper one that makes you buy missing parts right away.
Common beginner mistakes and how to avoid them
Most Arduino mistakes are normal, fixable, and part of learning. Beginners often place wires in the wrong breadboard rows, forget resistors for LEDs, select the wrong board or port, or copy code without checking pin numbers. The key is to troubleshoot calmly and step by step.
Use this quick checklist when a project does not work:
- Confirm the USB cable supports data, not just charging.
- Check that the correct board and port are selected.
- Make sure power and ground are connected where the circuit expects them.
- Verify LED polarity, sensor direction, and motor driver wiring.
- Match the code pin numbers to the real wiring.
- Test one part at a time before combining several modules.
- Read error messages carefully instead of ignoring them.
Also avoid jumping into hard projects too early. An arduino diy kit can do impressive things, but advanced builds feel frustrating if you skip the basics. Master LEDs, buttons, sensors, and serial monitor readings first; robotics and automation will feel much easier later.
Your next step after the first kit
After you finish the lessons in your arduino starter kit, start changing projects instead of only copying them. Change the timing, add another sensor, replace an LED with a buzzer, or combine two lessons into one build. This is where real learning begins, because you start making design choices instead of following steps line by line.
Keep your parts organized, save your working code, and build a small library of reusable circuits. Over time, your arduino kit becomes more than a beginner box. It becomes a creative workspace for learning programming, electronics, and problem solving. Whether you choose a general starter set, an arduino sensors kit, an arduino robotics kit, or a focused tutorial package, the most important step is to build often, test patiently, and learn from every circuit that fails the first time.
Q&A
Question: What is the best Arduino kit for a complete beginner?
Short answer: A general arduino starter kit or arduino beginner kit is usually the best choice for someone starting from zero. Look for a kit with a board, breadboard, jumper wires, LEDs, resistors, buttons, a few sensors, and clear step-by-step lessons. Good docs matter more than a huge number of parts because beginners need guided projects that explain both the wiring and the code.
Question: Should I buy a sensor kit, robotics kit, or general starter kit first?
Short answer: Start with a general starter kit if you want to learn the basics of electronics, coding, inputs, and outputs. Choose an arduino sensors kit if your main goal is measuring things like light, heat, distance, motion, or humidity. Choose an arduino robot kit or arduino robotics kit if you want moving projects with motors, wheels, a chassis, and motor drivers.
Question: Why is the Blink project recommended as the first Arduino project?
Short answer: The Blink project is useful because it confirms that your board, USB cable, Arduino IDE setup, selected board, selected port, and upload process are working. After the onboard LED blinks, building the same project with an external LED and resistor helps you see how code and wiring work together.
Question: What should I check first if my Arduino project does not work?
Short answer: Start with the simple checks: make sure the USB cable supports data, the correct board and port are selected, power and ground are connected well, and the code pin numbers match your wiring. Also check LED polarity, sensor direction, resistor placement, and breadboard rows. Testing one part at a time is usually better than changing the whole circuit at once.
Question: Is a larger Arduino kit always better value?
Short answer: Not always. A kit with many parts is not automatically better than a smaller kit with clear tutorials, labeled parts, durable accessories, and projects that move from easy to hard. A slightly more complete and well-documented kit can be better value than a cheaper box that needs extra purchases right away.