


WS2812B LED Strip: 7 Checks Before Buying

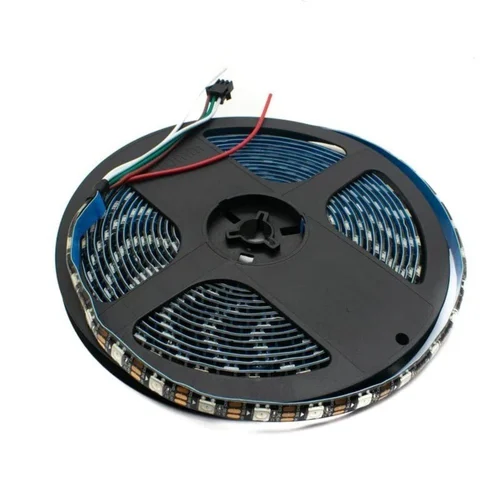
A WS2812B strip contains individually addressable RGB pixels. A controller sends colour data along the strip so each position can display a different value, unlike a conventional analogue RGB strip whose entire connected section follows the same channels.
The low data-wire count does not mean a long strip is a low-current load. Before buying, plan voltage, actual pixel count, wiring, protection and the controller interface as one system.

WS2812B strip price and listed length
| Listed item | Price (PKR) | Project role |
|---|---|---|
| 5V WS2812B 300 Pixel RGB LED Strip – Flexible Addressable Light Strip | 3,900 | 5 V addressable RGB strip listing with 300 pixels |
Price snapshot: Epro listings checked on 18 October 2026. Confirm the current price, availability, delivery charges and package quantity on the linked page before ordering. These are dated listing prices, not a quotation or an independent performance test.
The Epro WS2812B listing describes 300 pixels at sixty LEDs per metre, giving a listed five-metre length. Confirm the package, coating, connectors and included accessories on the current page. Do not assume a power supply or controller is included unless the package states it.
1. Match the strip’s voltage exactly
This listing is for a 5 V strip. It is not interchangeable with a 12 V addressable product or a four-wire analogue RGB strip. Applying a higher supply voltage is not a way to improve brightness and can destroy the pixels.
Check both the printed strip markings and the supply output before connection. A barrel connector that fits does not establish voltage or polarity. Keep the first test small and accessible rather than installing the entire reel before confirming its interface.
2. Budget current from the actual load
The Adafruit NeoPixel power guide uses up to 60 mA per classic RGB pixel at full white as a planning figure. Pixel revisions and actual patterns differ, so use the supplied part’s specifications and measure the intended load.
For perspective, 300 multiplied by 60 mA is 18 A. That is an illustrative upper-budget calculation using that assumption, not a measurement of this reel. It shows why a complete strip must not be powered from a controller GPIO or a casually chosen USB connection.
3. Plan power distribution and protection
Long copper paths cause voltage drop. Feeding a large strip only from one end can produce colour changes or instability at the far end even when the supply’s nominal voltage looks correct. Suitable wiring and planned power injection may be necessary.
Newest in the store


Size conductors, connectors and protective devices for the actual installation. A large 5 V supply can still produce dangerous fault heating in thin wires. Use an enclosed, appropriately protected low-voltage source and do not parallel unrelated supply outputs casually.
4. Check data direction before mounting
Data enters at DIN and continues from DOUT to the next pixel. Follow the arrows and labels on the actual strip. Connecting the controller to the output end is not fixed by reversing a software animation.
Keep the controller-to-first-pixel lead short for the first test and share the intended ground reference. Connectors and wire colours vary, so identify power, ground and data from the actual markings instead of assuming a universal order.
5. Match the controller’s signal voltage
A conventional 5 V Uno is a straightforward starting platform for a compatible 5 V strip. A 3.3 V controller often requires an appropriate fast logic-level shifter, such as the type recommended in the NeoPixel best-practices guide.
Do not assume a generic slow pull-up MOSFET I2C converter is suitable for the pixel data waveform. Choose a translator for the direction, timing and logic thresholds involved. A short unshifted demonstration that happens to light is not proof of guaranteed margins.
6. Add the recommended connection precautions
The Adafruit guide recommends a 300–500 Ω data resistor near the first pixel and a 500–1000 µF supply capacitor rated at least 6.3 V for the discussed 5 V arrangement. Observe capacitor polarity and verify whether a particular assembly already includes suitable components.
These precautions do not replace correct supply regulation, protection or wire sizing. Avoid live wiring changes. Make ground connections before data and avoid sending a powered controller’s signal into an unpowered strip.
7. Begin with a small defined segment
Follow the WS2812B Arduino wiring and code guide using a short eight-pixel test segment, not the entire 300-pixel reel. Confirm pixel type, colour order and power first, then scale the installation deliberately. This guide does not claim a particular service life, waterproof rating or independently tested maximum brightness.